Why This Guide Matters
If you’re like me, you might have struggled to find a clear guide to setting up Picsur with ShareX . Picsur boasts some excellent features, including ShareX integration, but documentation for this feature is practically non-existent.
- The official Picsur GitHub repository and its website lack instructions.
- GitHub issues on this topic were closed without providing clear answers.
- No help could be found in popular forums like r/selfhosted.
To save you the same frustration, here’s a detailed step-by-step guide to integrate Picsur with ShareX.
Step 1: Generate an API Key in Picsur
- Log in to your Picsur instance.
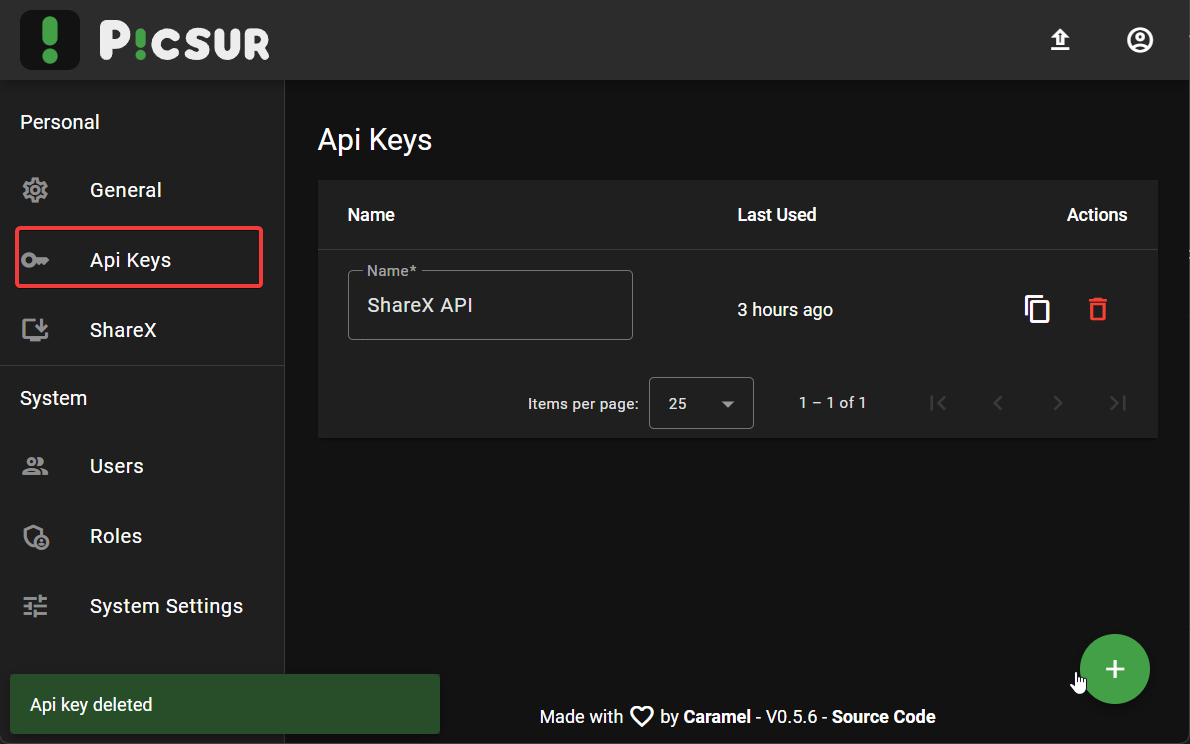
- Navigate to the
Api Keyspage from the settings menu. - Click Generate API Key, and give it a descriptive name, like
ShareX API. - Save your changes.

Step 2: Configure the ShareX Integration
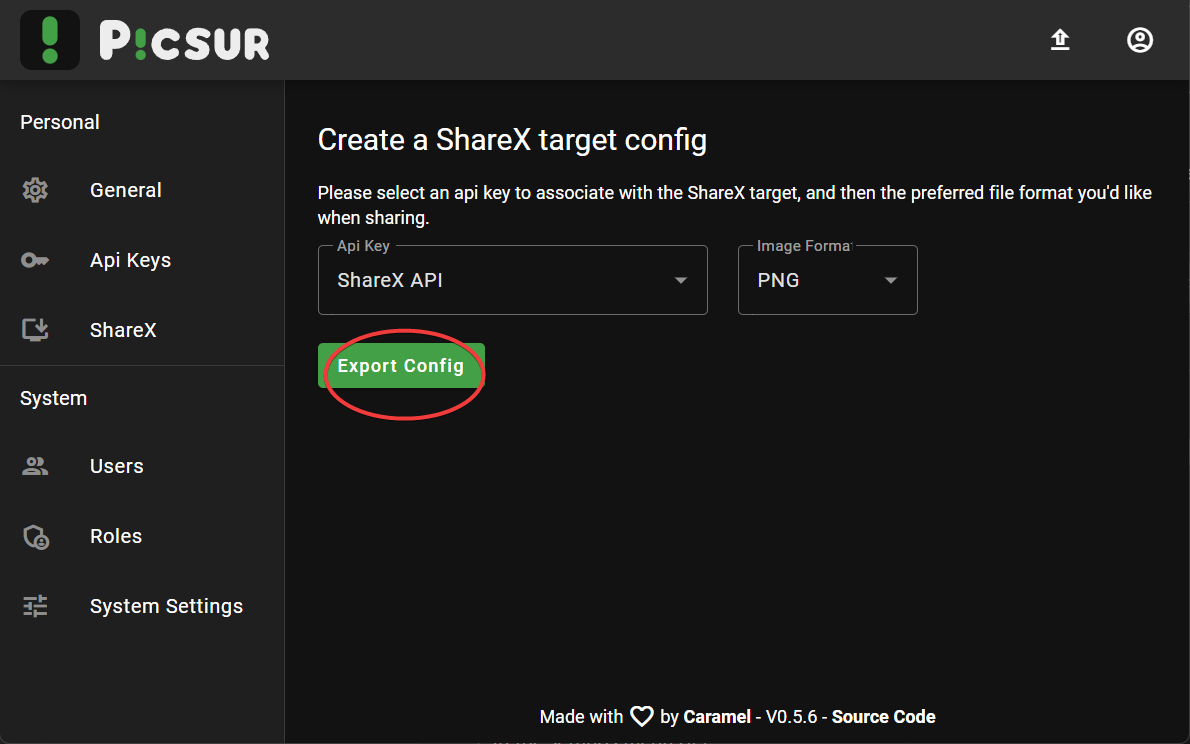
- In the settings menu of Picsur, go to the
ShareXpage (located next toApi Keys). - From the dropdown, select the API key you just created.
- Set the Image Format to
PNG(recommended for high-quality uploads). - Click the Export Config button to download the
.sxcufile.

Step 3: Import the Config to ShareX
- Locate the downloaded
.sxcufile on your system. - Double-click the file to open it.
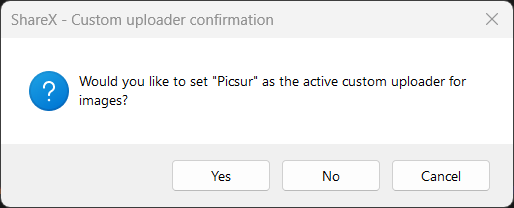
- You’ll see a prompt asking if you want to set Picsur as the active custom uploader for ShareX.
- Confirm by clicking Yes.

Tip for automatic upload
To automatically upload images to your Picsur instance, configure ShareX's After capture tasks and enable the Upload image to host option.
Happy Screenshotting!
Once setup is complete, you can use ShareX to take screenshots and have them automatically uploaded to your Picsur instance. This setup ensures quick, reliable, and self-hosted screenshot management.
